#소스트리(Sourcetree)에서 push시 토근 인증 요구[remote: Support for password authentication was removed on August 13, 2021.] 오류 해결 방법
-2021년 8월 13일부터 유저 이름과 비밀번호로 인증을 하던 방식에서, 개인 인증 토큰을 이용해서 git에 접근할 수 있는 방식으로 바뀌었습니다.
-깃허브에서 개인 인증 토큰을 따로 생성해서 git에 접근해야 합니다.
#소스트리에서 Push시 비밀번호 대신 인증 토큰을 사용하라는 문구의 오류가 발생합니다.

#오류 내용
git -c diff.mnemonicprefix=false -c core.quotepath=false --no-optional-locks push -v --tags origin main:main
remote: Support for password authentication was removed on August 13, 2021.
remote: Please see https://docs.github.com/en/get-started/getting-started-with-git/about-remote-repositories#cloning-with-https-urls for information on currently recommended modes of authentication.
fatal: Authentication failed for 'https://github.com/lemonaS2/github_test.git/'
Pushing to https://github.com/lemonaS2/github_test.git
오류가 나면서 완료됨.
#오류 해결 방법
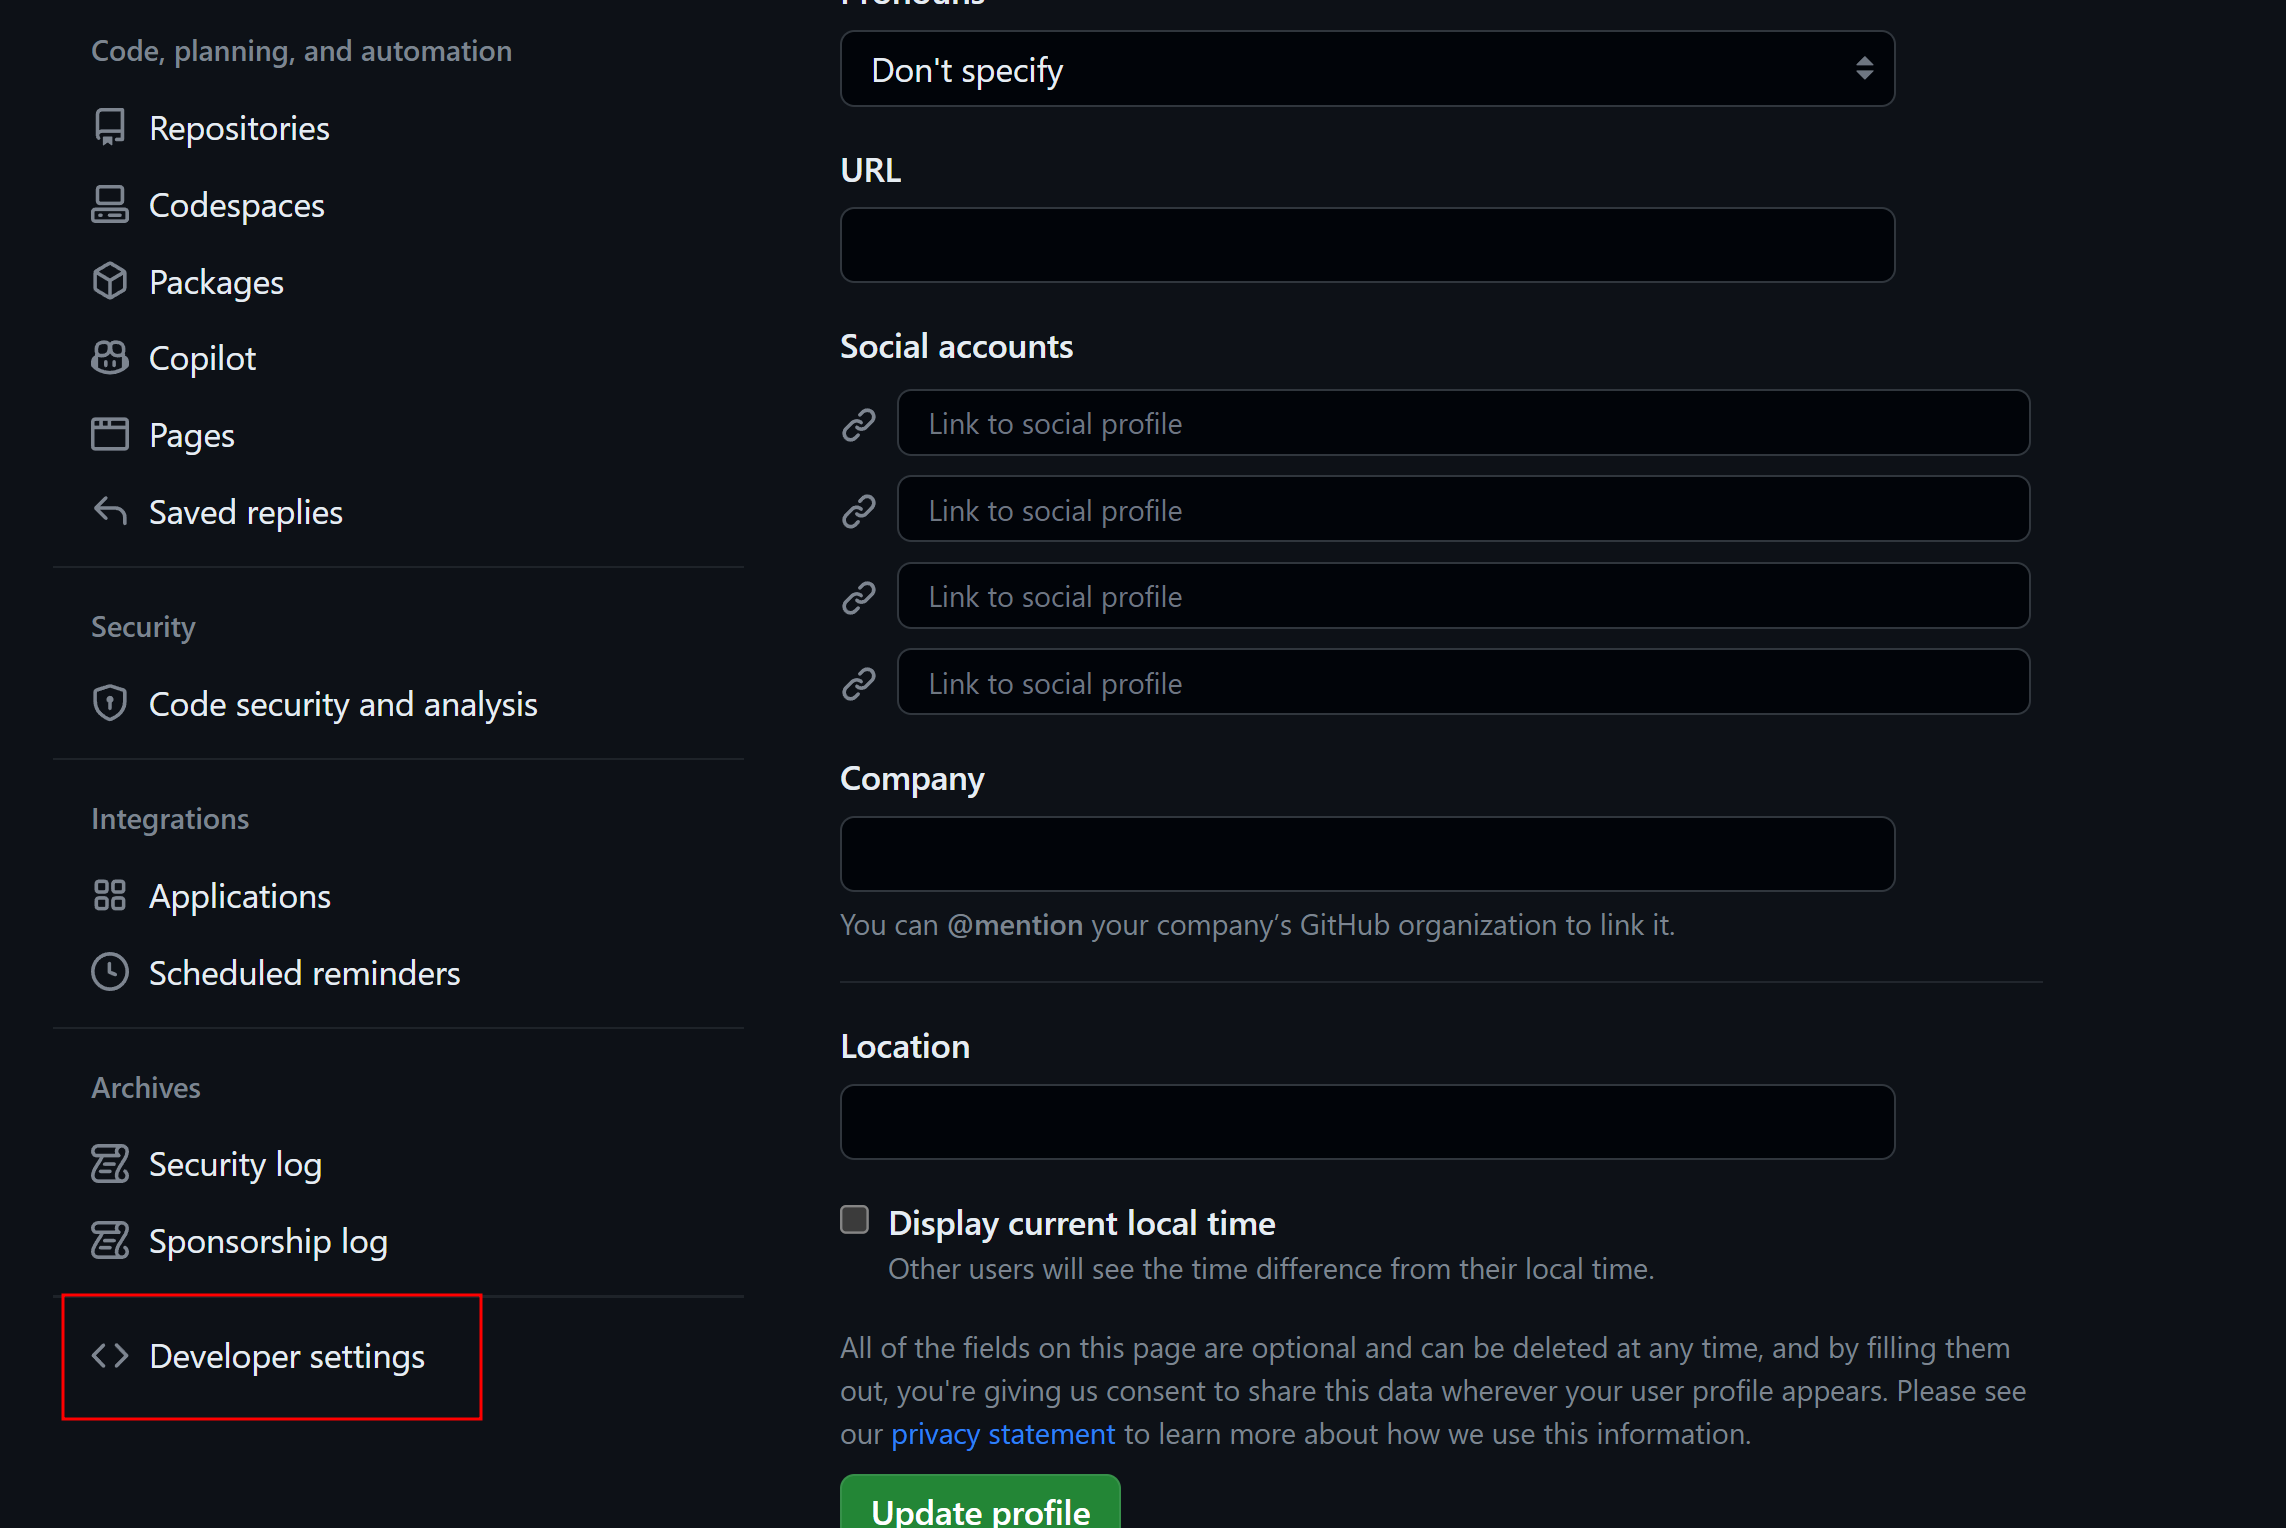
1. 깃허브 로그인 후 Settings 항목을 클릭합니다.

2. 스크롤을 내려서 좌측하단에 Developer settings 항목을 클릭합니다.
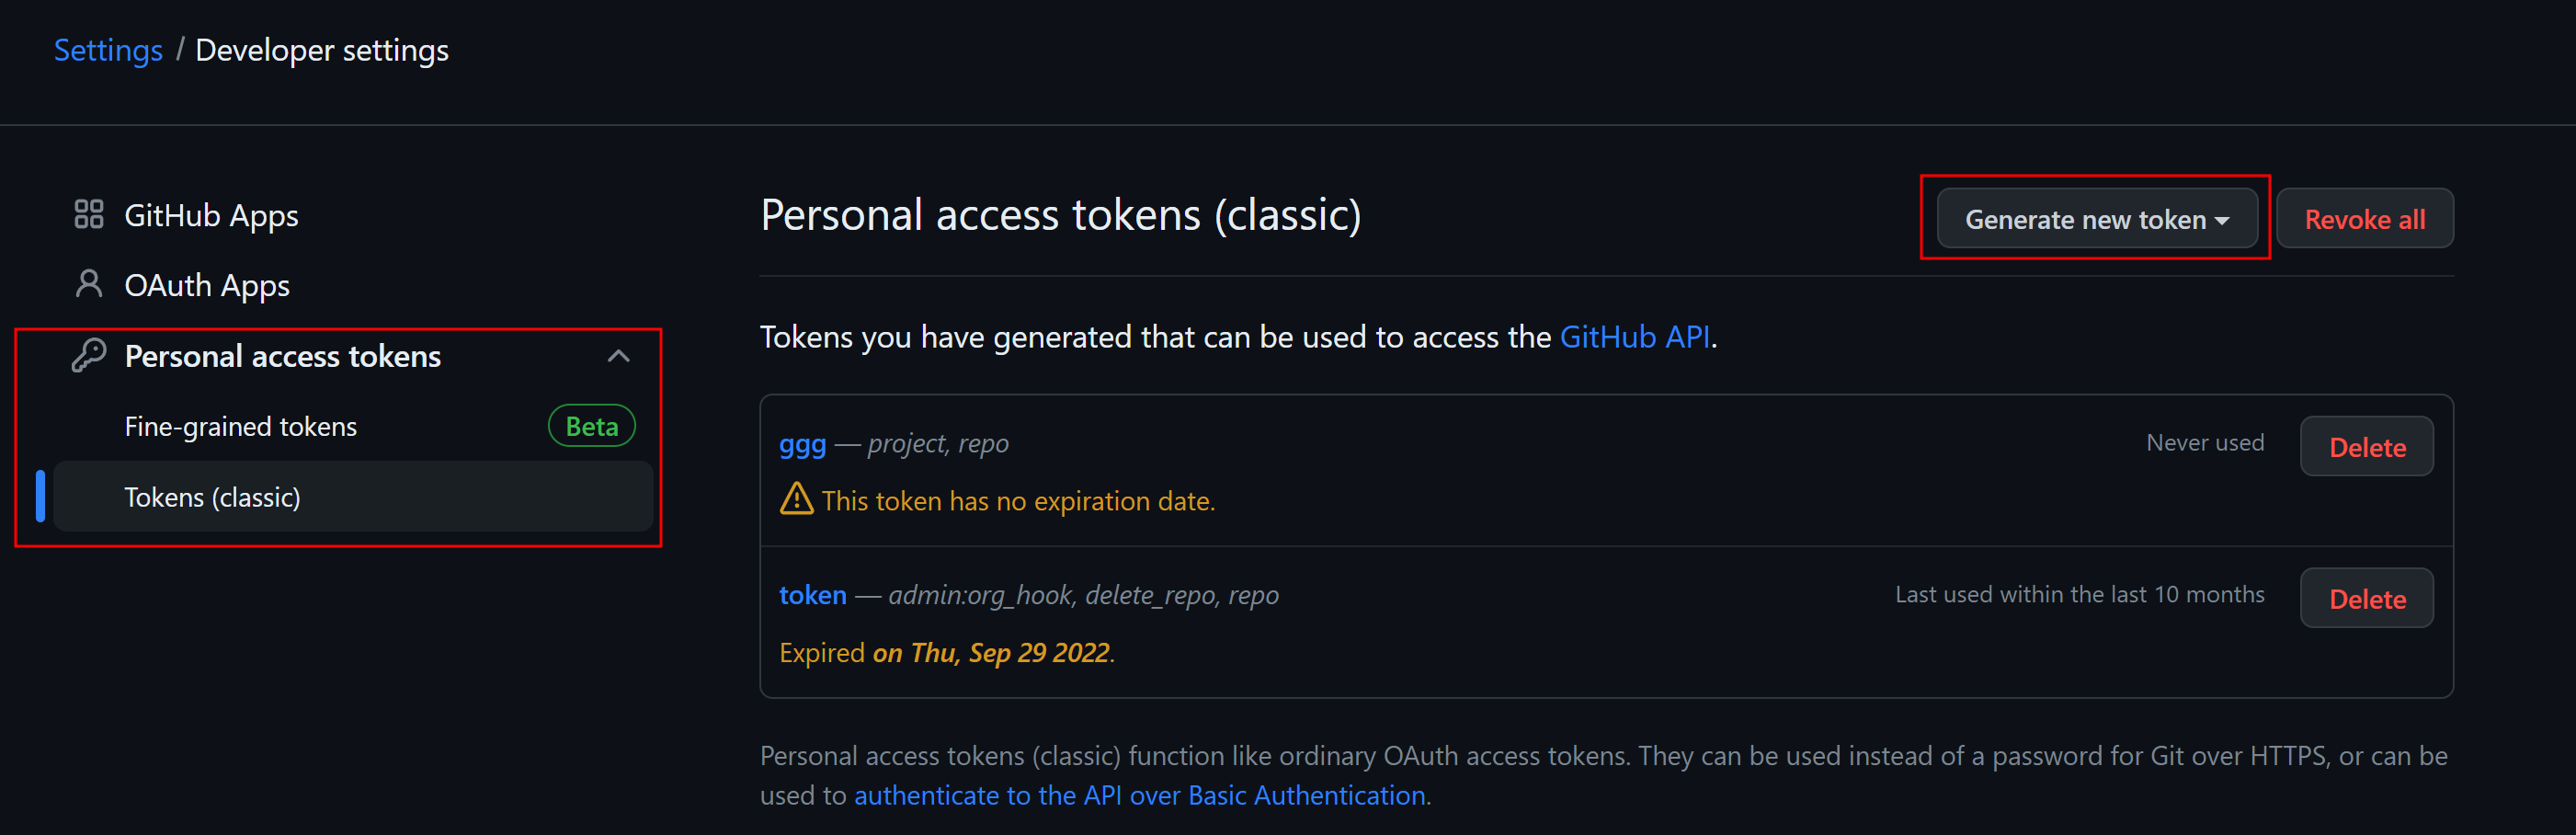
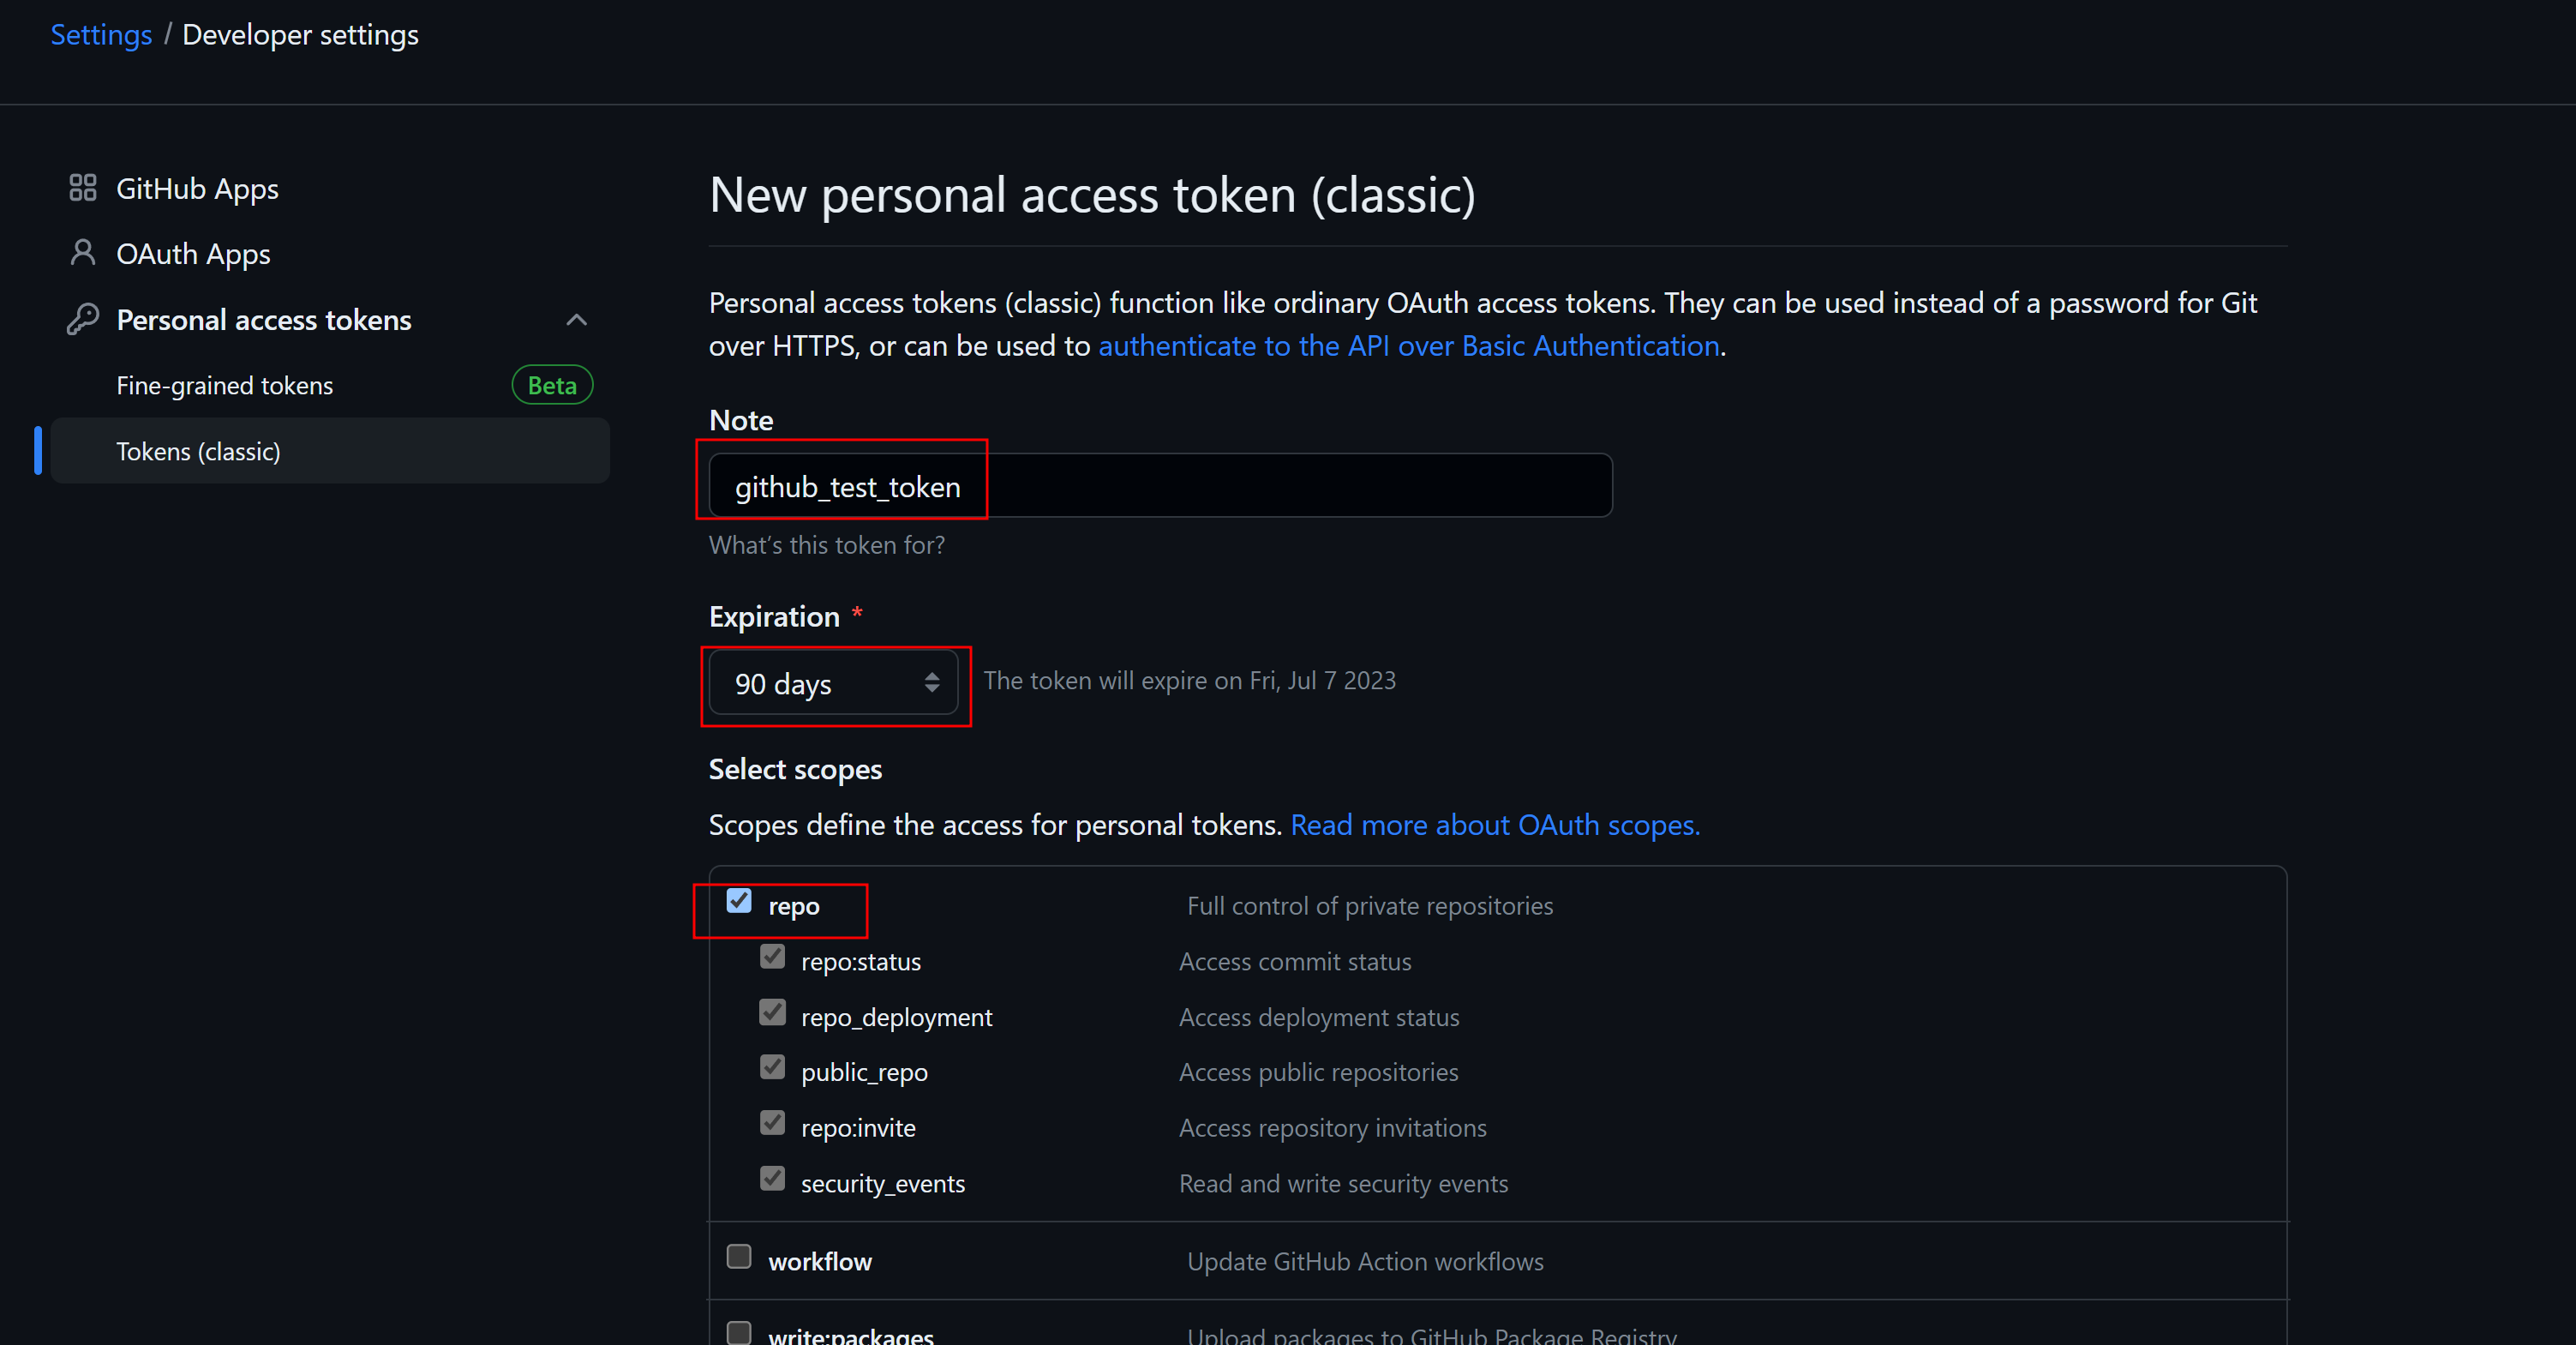
3. 좌측에 Personal access tokens -> Tokens (classic) 항목을 클릭하고 우측상단의 Generate new token 버튼을 클릭해서 새로운 인증 토큰을 생성해 줍니다.
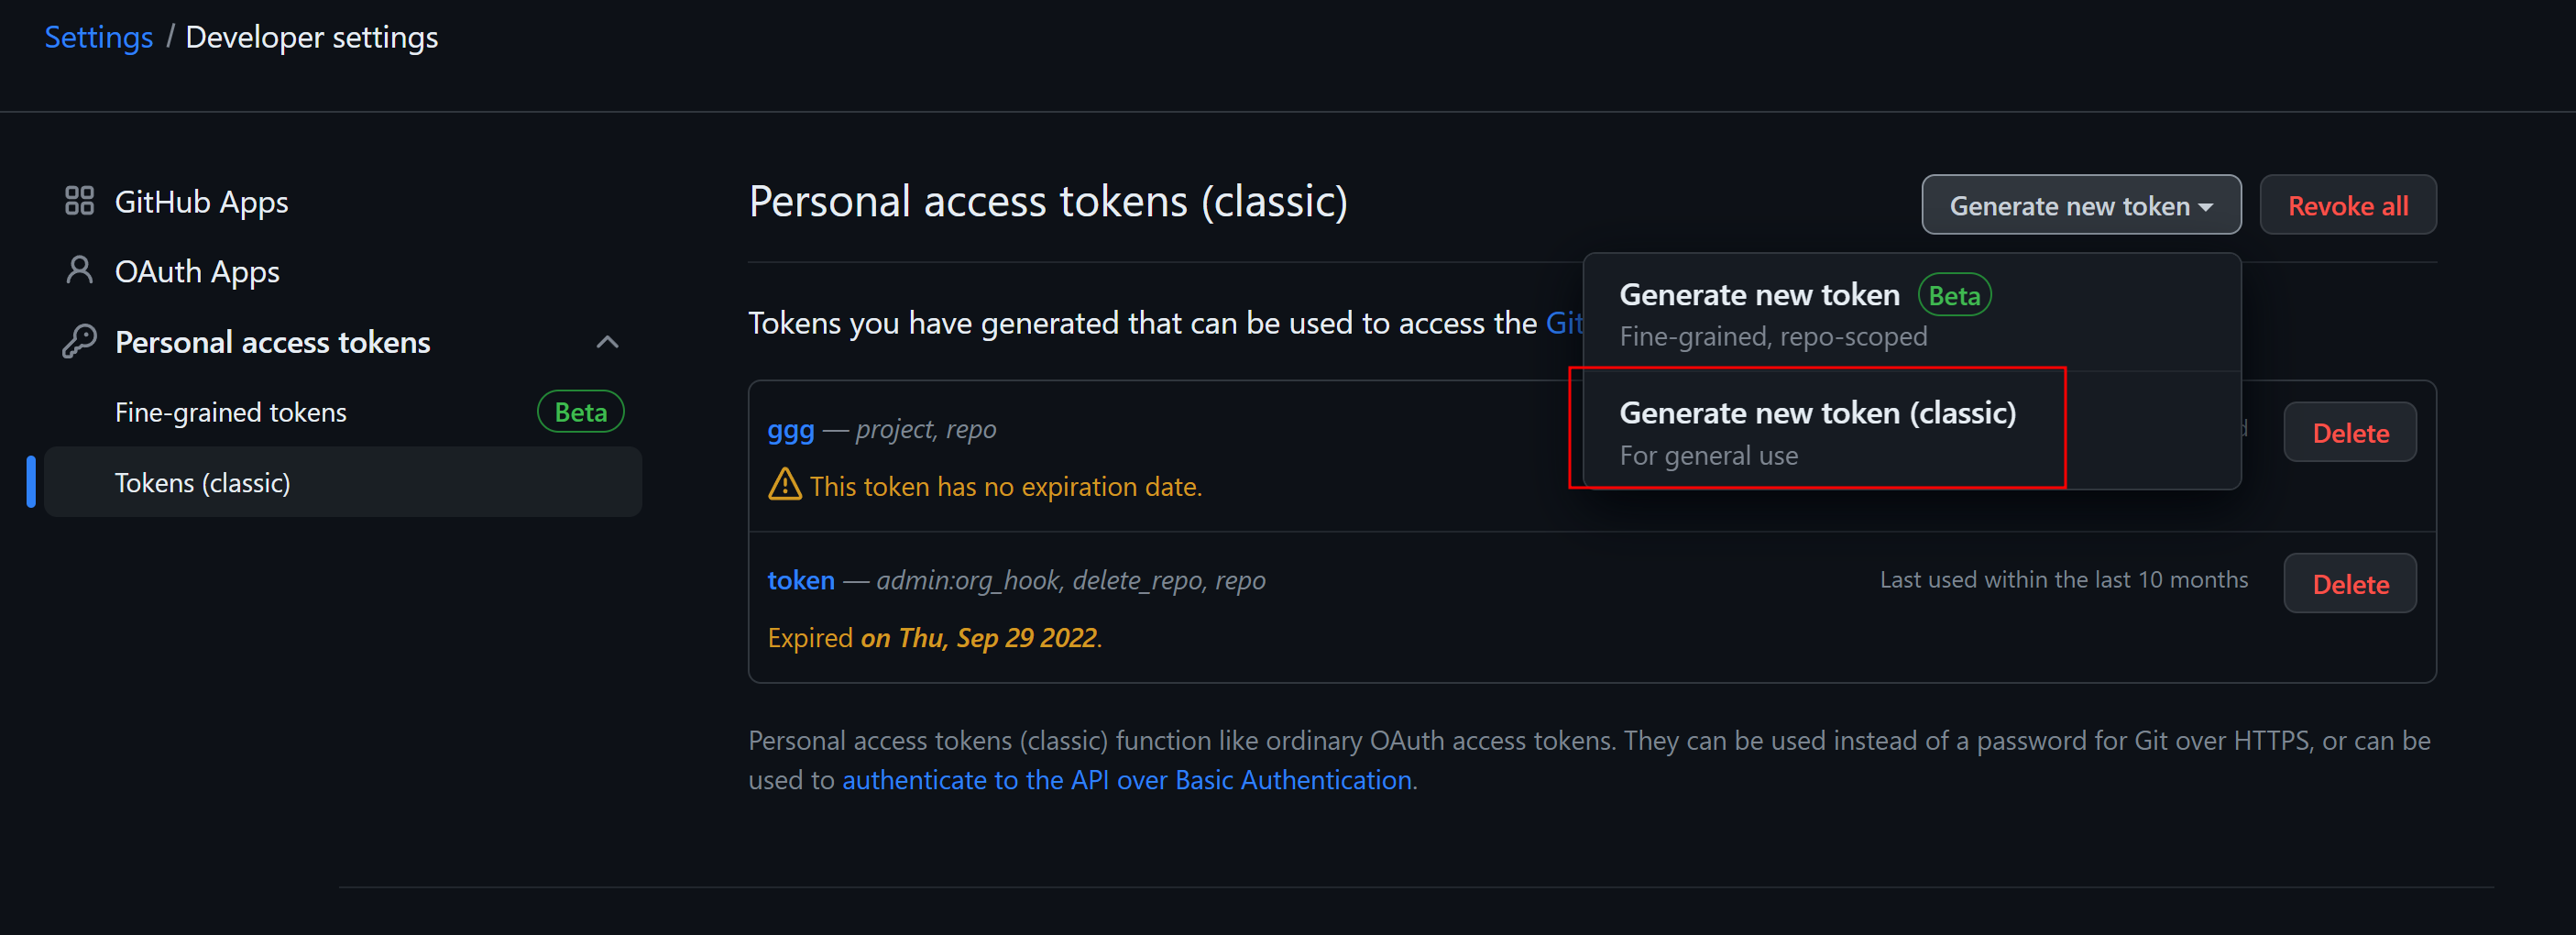
4. Generate new token (classic)를 선택해 줍니다.
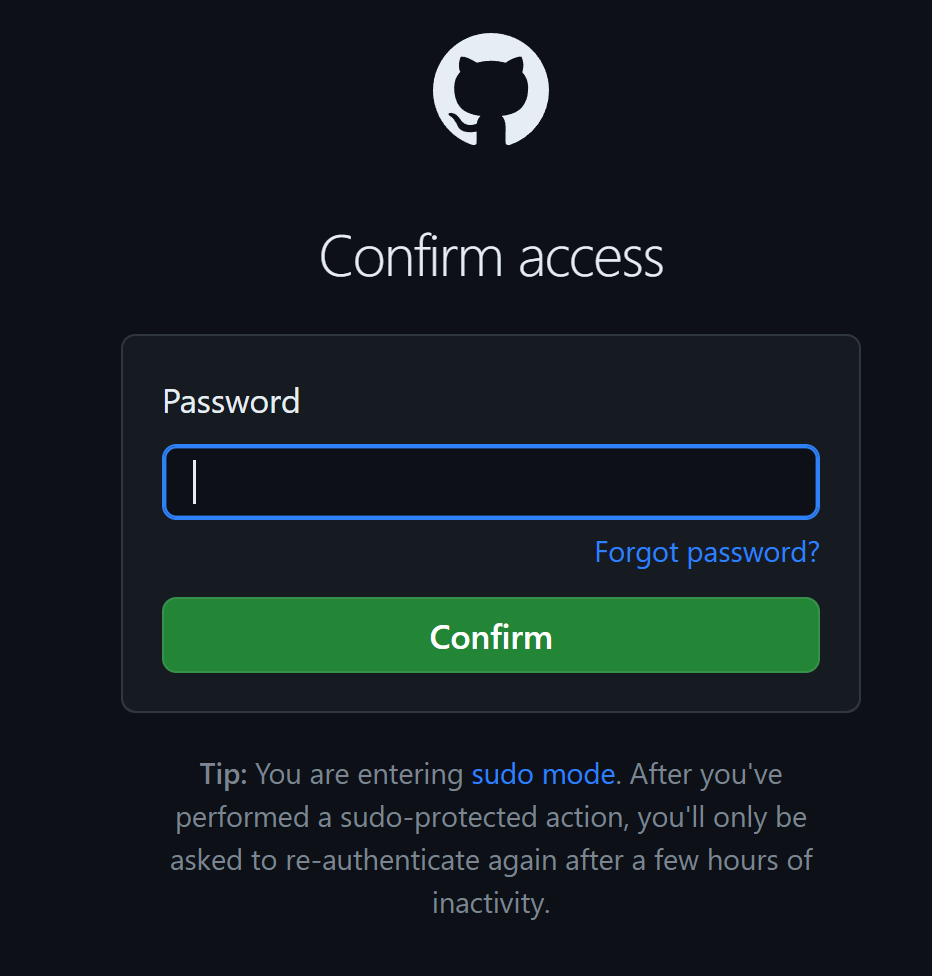
5. 설정 변경을 위해서 깃허브 계정 패스워드를 한번 더 입력해 줍니다.
6. 깃허브 토큰명과 유효기간 기본적이 레파지토리 설정(repo)만 체크합니다.
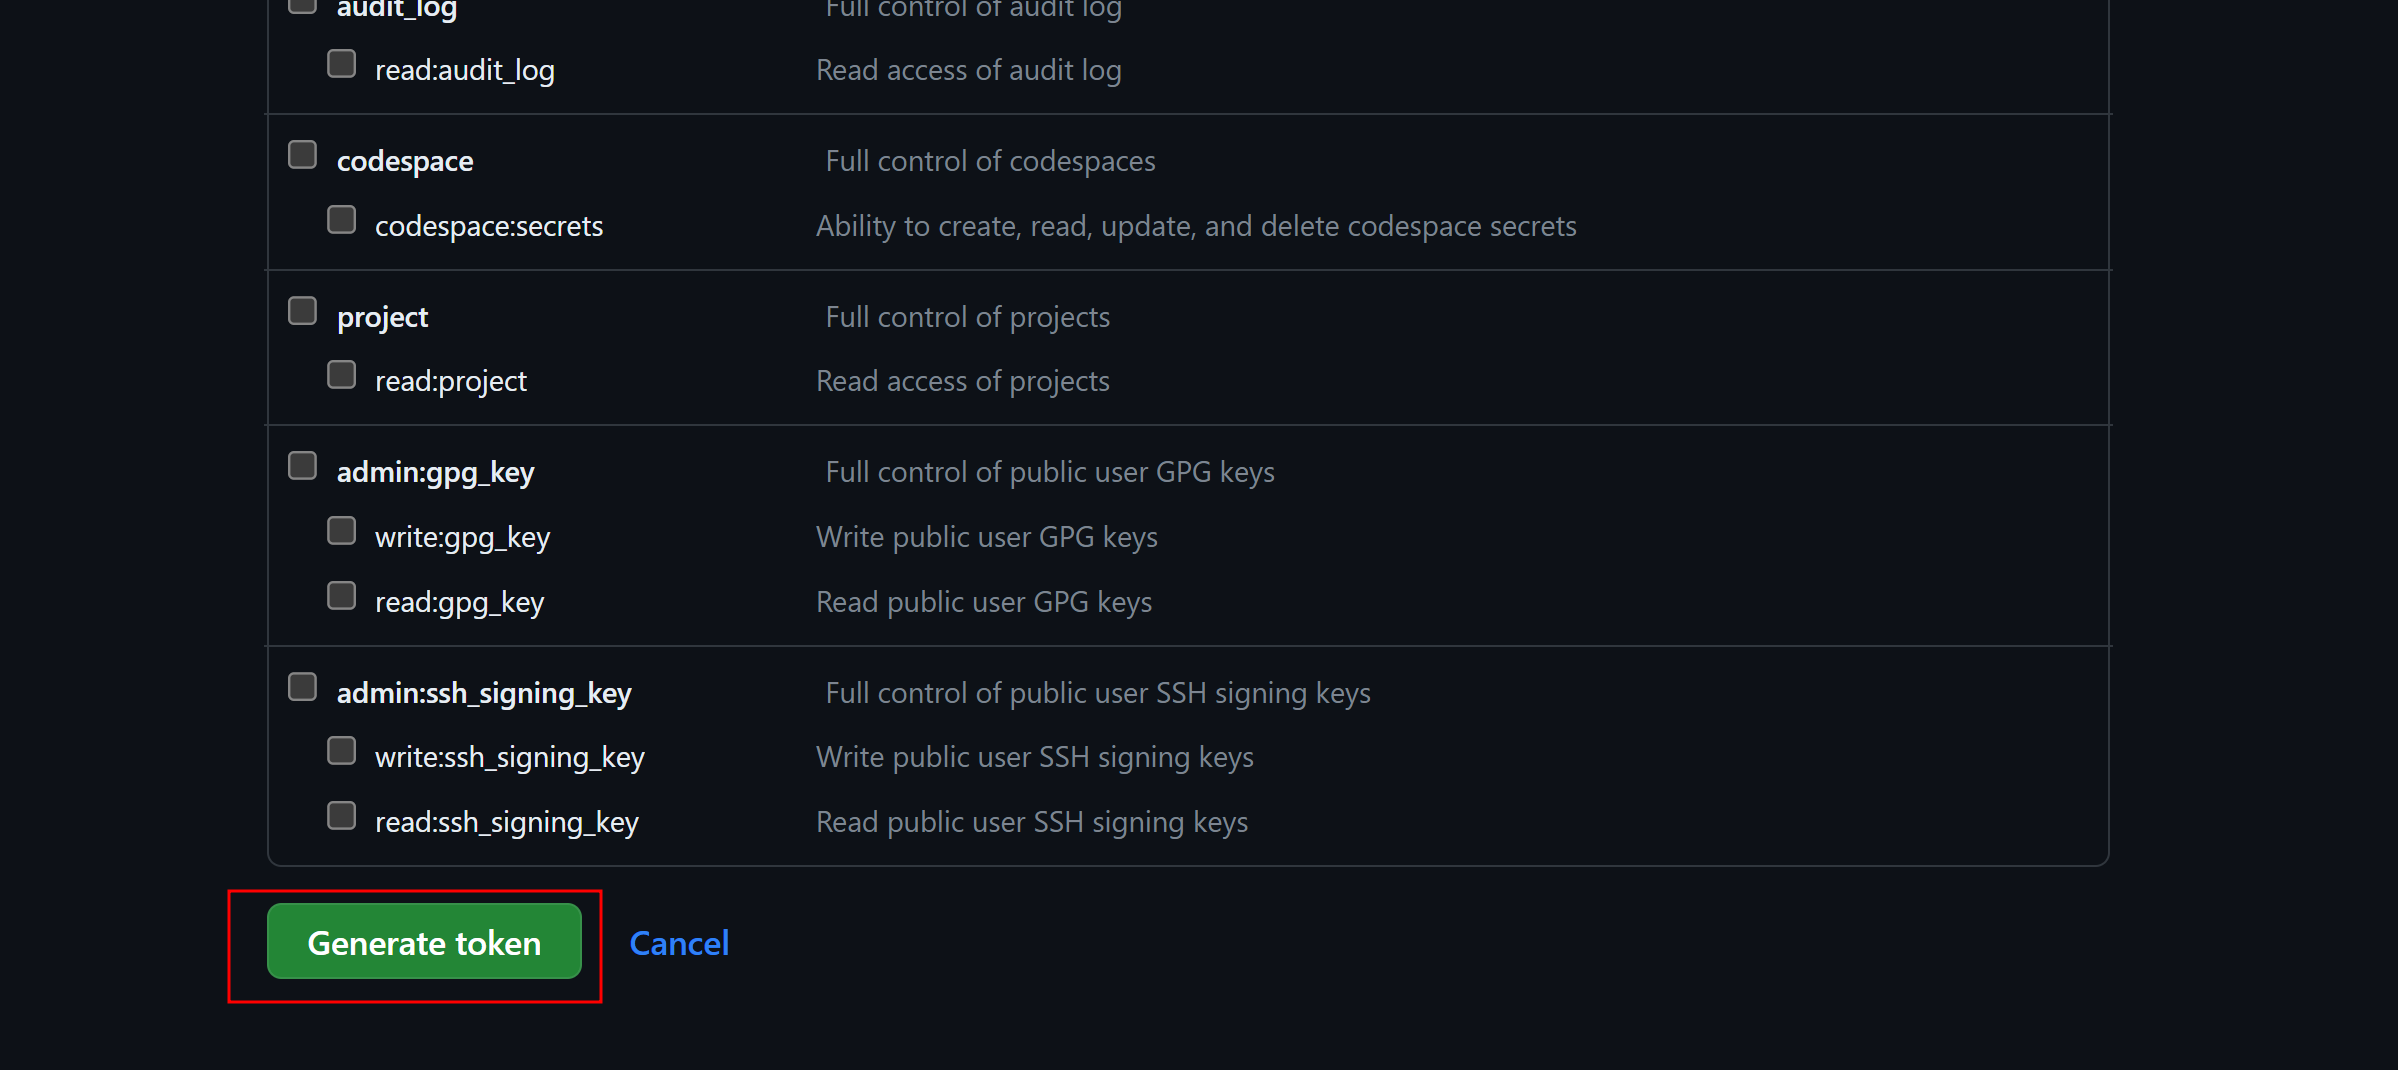
7. 하단의 Generate token 버튼을 클릭해서 깃 인증 토큰을 생성합니다.
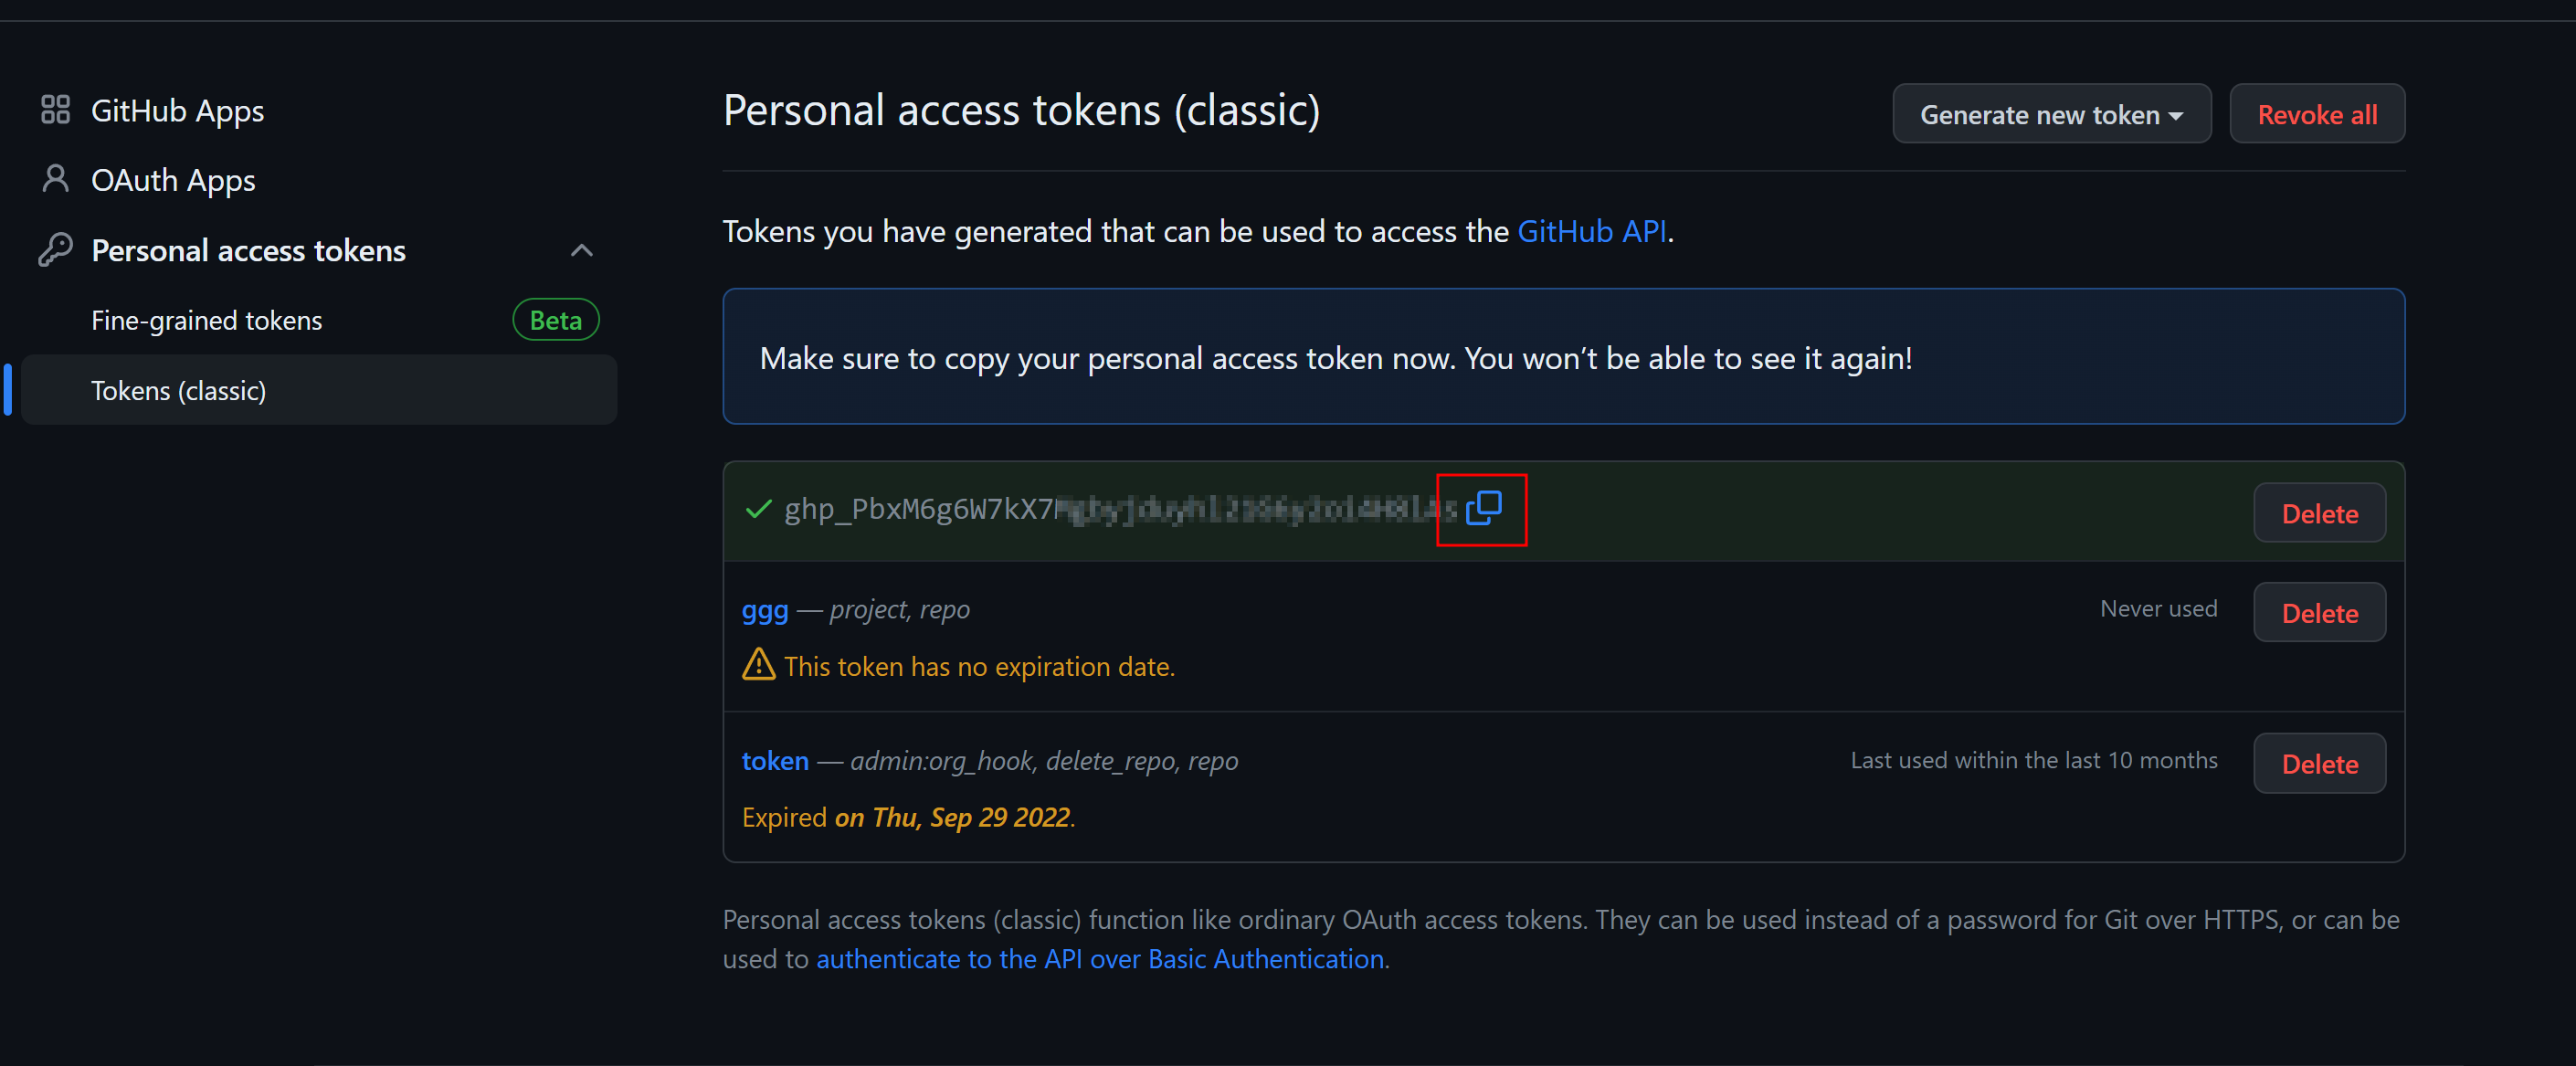
8. 토큰 목록에 있는 새로 생성된 토큰 값을 따로 저장해 놓습니다.
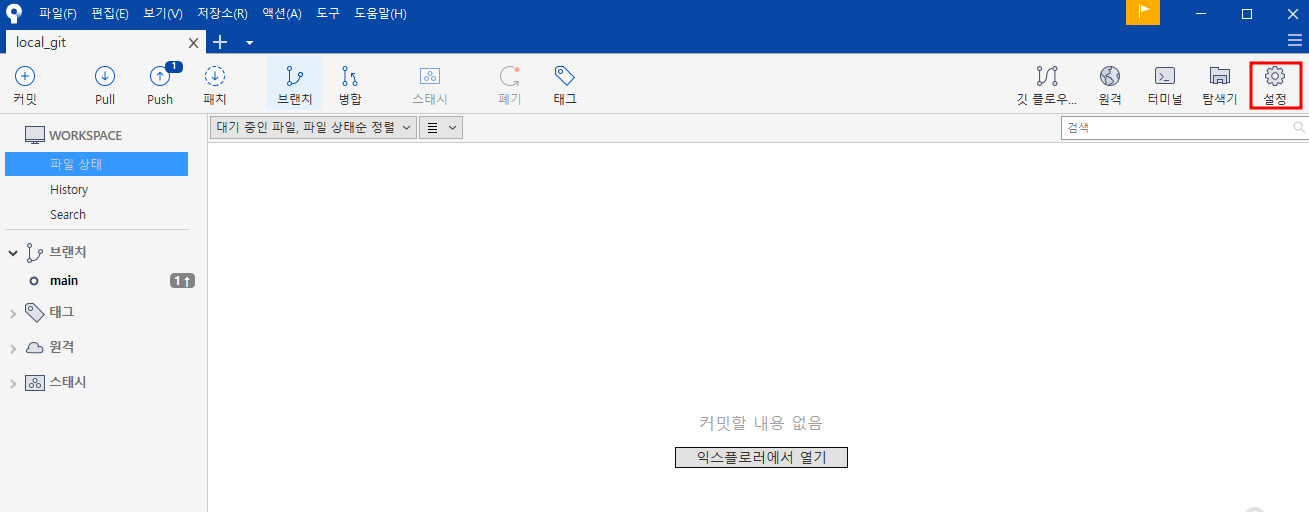
9. 이제 다시 소스트리로 돌아가서 우측 상단에 있는 설정 버튼을 클릭합니다.
10. 저장소 설정 -> 원격의 경로에 주소 부분을 더블클릭합니다.
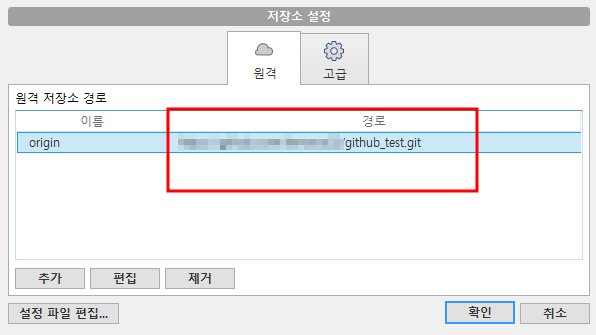
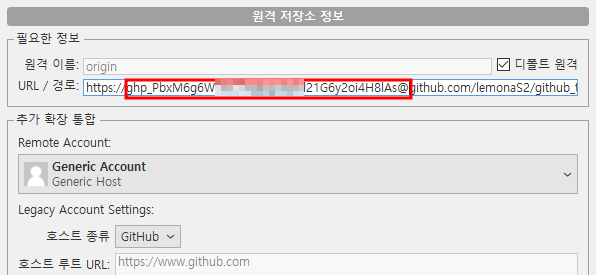
11. URL / 경로 부분에서 깃허브에서 생성한 개인 인증 "토큰값@" 를 추가해 주고 확인 버튼을 클릭하면 정상적으로 소스트리의 푸시 작업등을 진행할 수 있습니다.
-기존: https://github.com/abc/a.git -> 변경: https://토큰값@github.com/abc/a.git
'IT > Git' 카테고리의 다른 글
| [Git/GitHub] - 깃 다운로드 및 설치 방법 (0) | 2024.01.01 |
|---|---|
| [Git/GitHub] - 깃 커밋 메시지 컨벤션(Git Commit Message Convention) (0) | 2023.11.30 |
| [Git/GitHub] - 깃(깃허브) 원격저장소(Remote Repository) 생성하는 방법 (0) | 2023.04.08 |
| [Git/GitHub] - 깃(깃허브) 원격저장소(Remote Repository) 삭제하는 방법 (0) | 2023.04.08 |
| [Git/GitHub] - 이클립스(STS)에서 프로젝트 깃 연동시 Internal error; consult Eclipse error log. 에러 해결 방법 (0) | 2022.11.12 |


댓글